

I recently added functionality to this site to allow visitors to filter posts based on the posts description, title, and tags in an effort to allow better discovery of content. This tutorial will is based off of how I implemented a basic search on this site and will cover how to create a search filter on a site built with GatsbyJS. In particular, this tutorial walks through how to create an input field that allows users to filter a list of an entire Gatsby site’s posts if the description, title or tags matches the input query. The solution proposed in this tutorial leverages GraphQL and React hooks to update the state to show appropriate data when content is filtered.
Getting Started
Prerequisites
Although, some of the implementation details can be abstracted and applied in any React application to get the most value out of this tutorial you should have:
- Some knowledge of ES6 and React
- Local Gatsby site with Markdown posts
- If you have a Gatsby site without Markdown posts check out the Boilerplate Code or update the code in this tutorial to query posts from your data source instead.
If you do not yet have Markdown files on your site then you should start by adding markdown pages to Gatsby. You can also learn more about creating an index of markdown posts in the Gatsby Docs.
Boilerplate Code: Query All Posts
If you do not already have an index page listing all of your posts then create a new gatsby page for example named “writing.js” in src within the pages directory. This file will be responsible for rendering information about every post on your site.
We will be using a GraphQL page query which allows the data returned from the query to be available to the component in the data prop. The posts are returned by the page query and are equal to data.allMarkdownRemark.edges . Once we have the posts we can .map() through each of the posts and destructure the node.frontmatter with const { tags, title, date, description, slug } = node.frontmatter. This will add the title, date, description, and slug to the DOM for each post.
“Gatsby uses the concept of a page query, which is a query for a specific page in a site. It is unique in that it can take query variables unlike Gatsby’s static queries.” Source: Gatsby Docs
Below is the boilerplate code that will be used throughout this tutorial:
import React from "react";
import { Link, graphql } from "gatsby";

const BlogIndex = (props) => {
  const { data } = props;
  const posts = data.allMarkdownRemark.edges;

  return (
    <>
      {/* in my site I wrap each page with a Layout and SEO component which have
    been omitted here for clarity and replaced with a React.fragment --> */}

      {/*in-line css for demo purposes*/}
      <h1 style={{ textAlign: `center` }}>Writing</h1>

      {posts.map(({ node }) => {
        const { excerpt } = node;
        const { slug } = node.fields;

        const { title, date, description, slug } = node.frontmatter;
        return (
          <article key={slug}>
            <header>
              <h2>
                <Link to={slug}>{title}</Link>
              </h2>

              <p>{date}</p>
            </header>
            <section>
              <p
                dangerouslySetInnerHTML={{
                  __html: description || excerpt,
                }}
              />
            </section>
            <hr />
          </article>
        );
      })}
    </>
  );
};

export default BlogIndex;

export const pageQuery = graphql`
  query {
    allMarkdownRemark(sort: { order: DESC, fields: frontmatter___date }) {
      edges {
        node {
          excerpt(pruneLength: 200)
          id
          frontmatter {
            title
            description
            date(formatString: "MMMM DD, YYYY")
            tags
          }
          fields {
            slug
          }
        }
      }
    }
  }
`;
At this point you should be able to view an index of all of the posts on your site by running gatsby develop and going to http://localhost:8000/${NAME_OF_FILE}. For example, the file I created is named writing.js so I navigate to http://localhost:8000/writing to view it. The page output by the boilerplate code above should resemble the below image (i.e., each blog post is listed along with its title, date, and description). Additionally, the header for each article should navigate to the slug for the article and be a valid link.
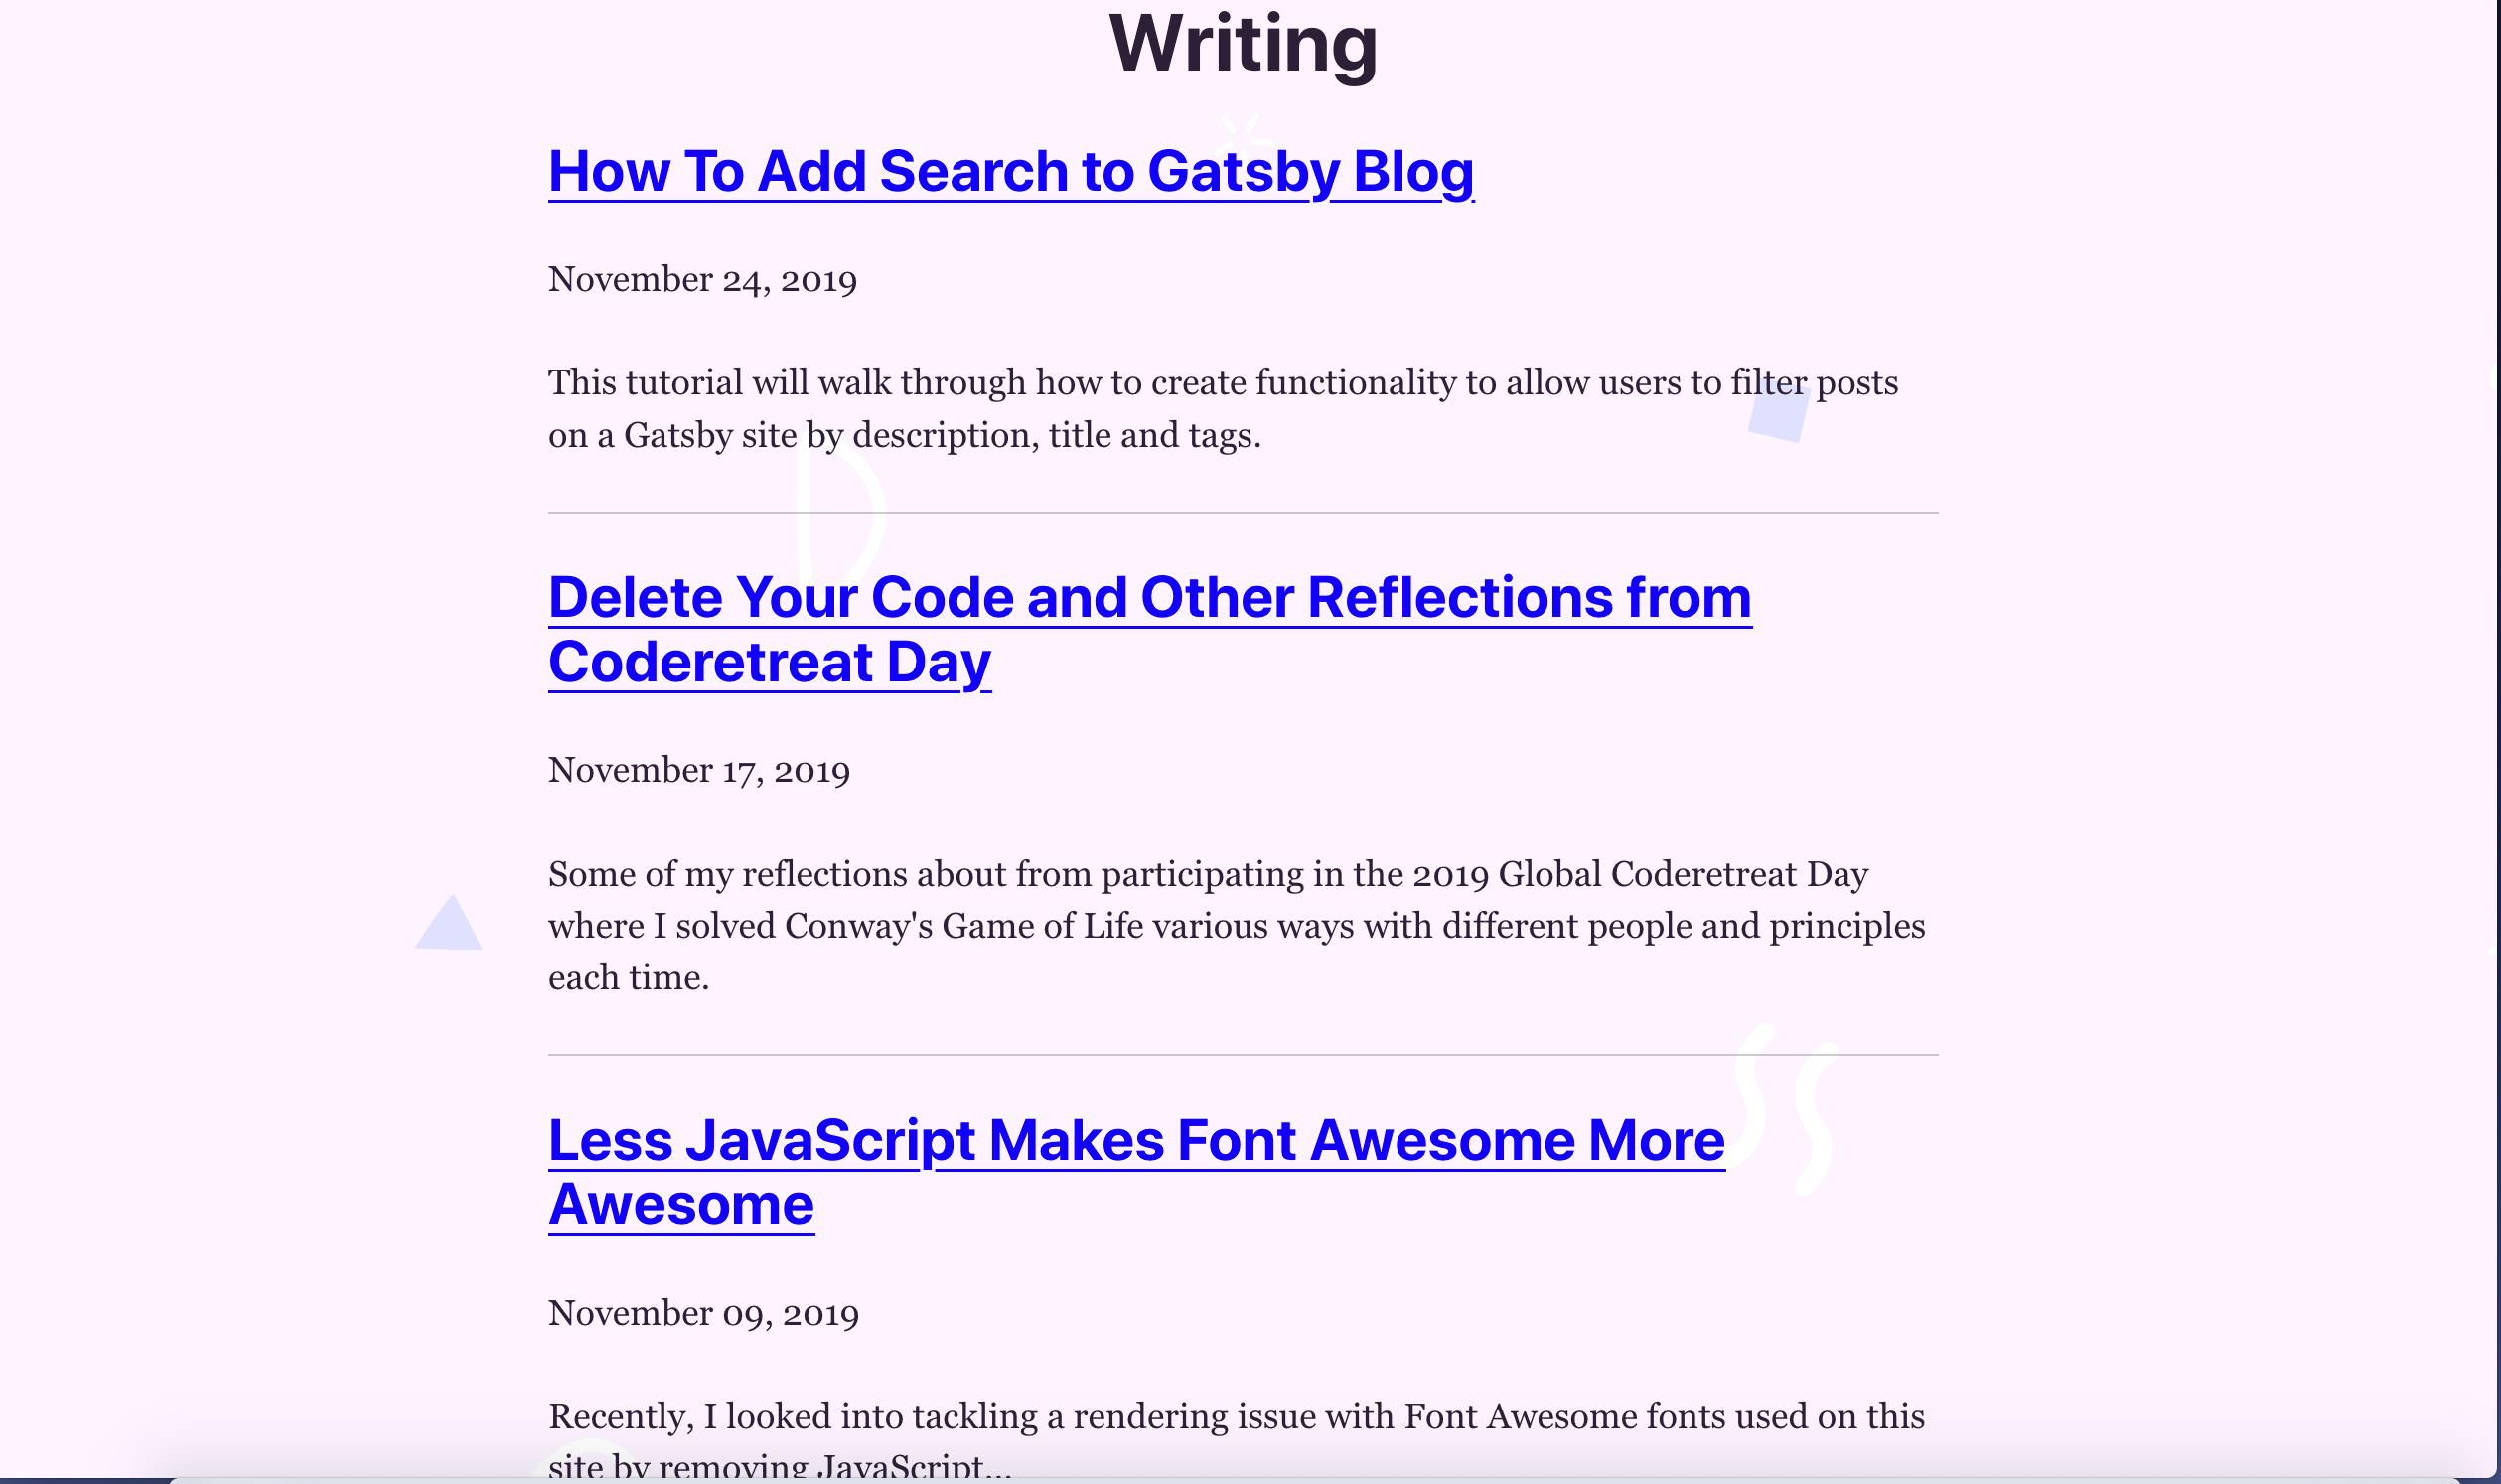
Why Query All of The Posts?
Before filtering the posts its helpful fetch all of the posts before we return a filtered subset from all of the posts. On my site, I used a page query on the /writing/ page to retrieve data for all the blog posts from my site so that I can construct a list of posts. The results of the page query are available to this component within the data prop to the component i.e., (const { data } = props).
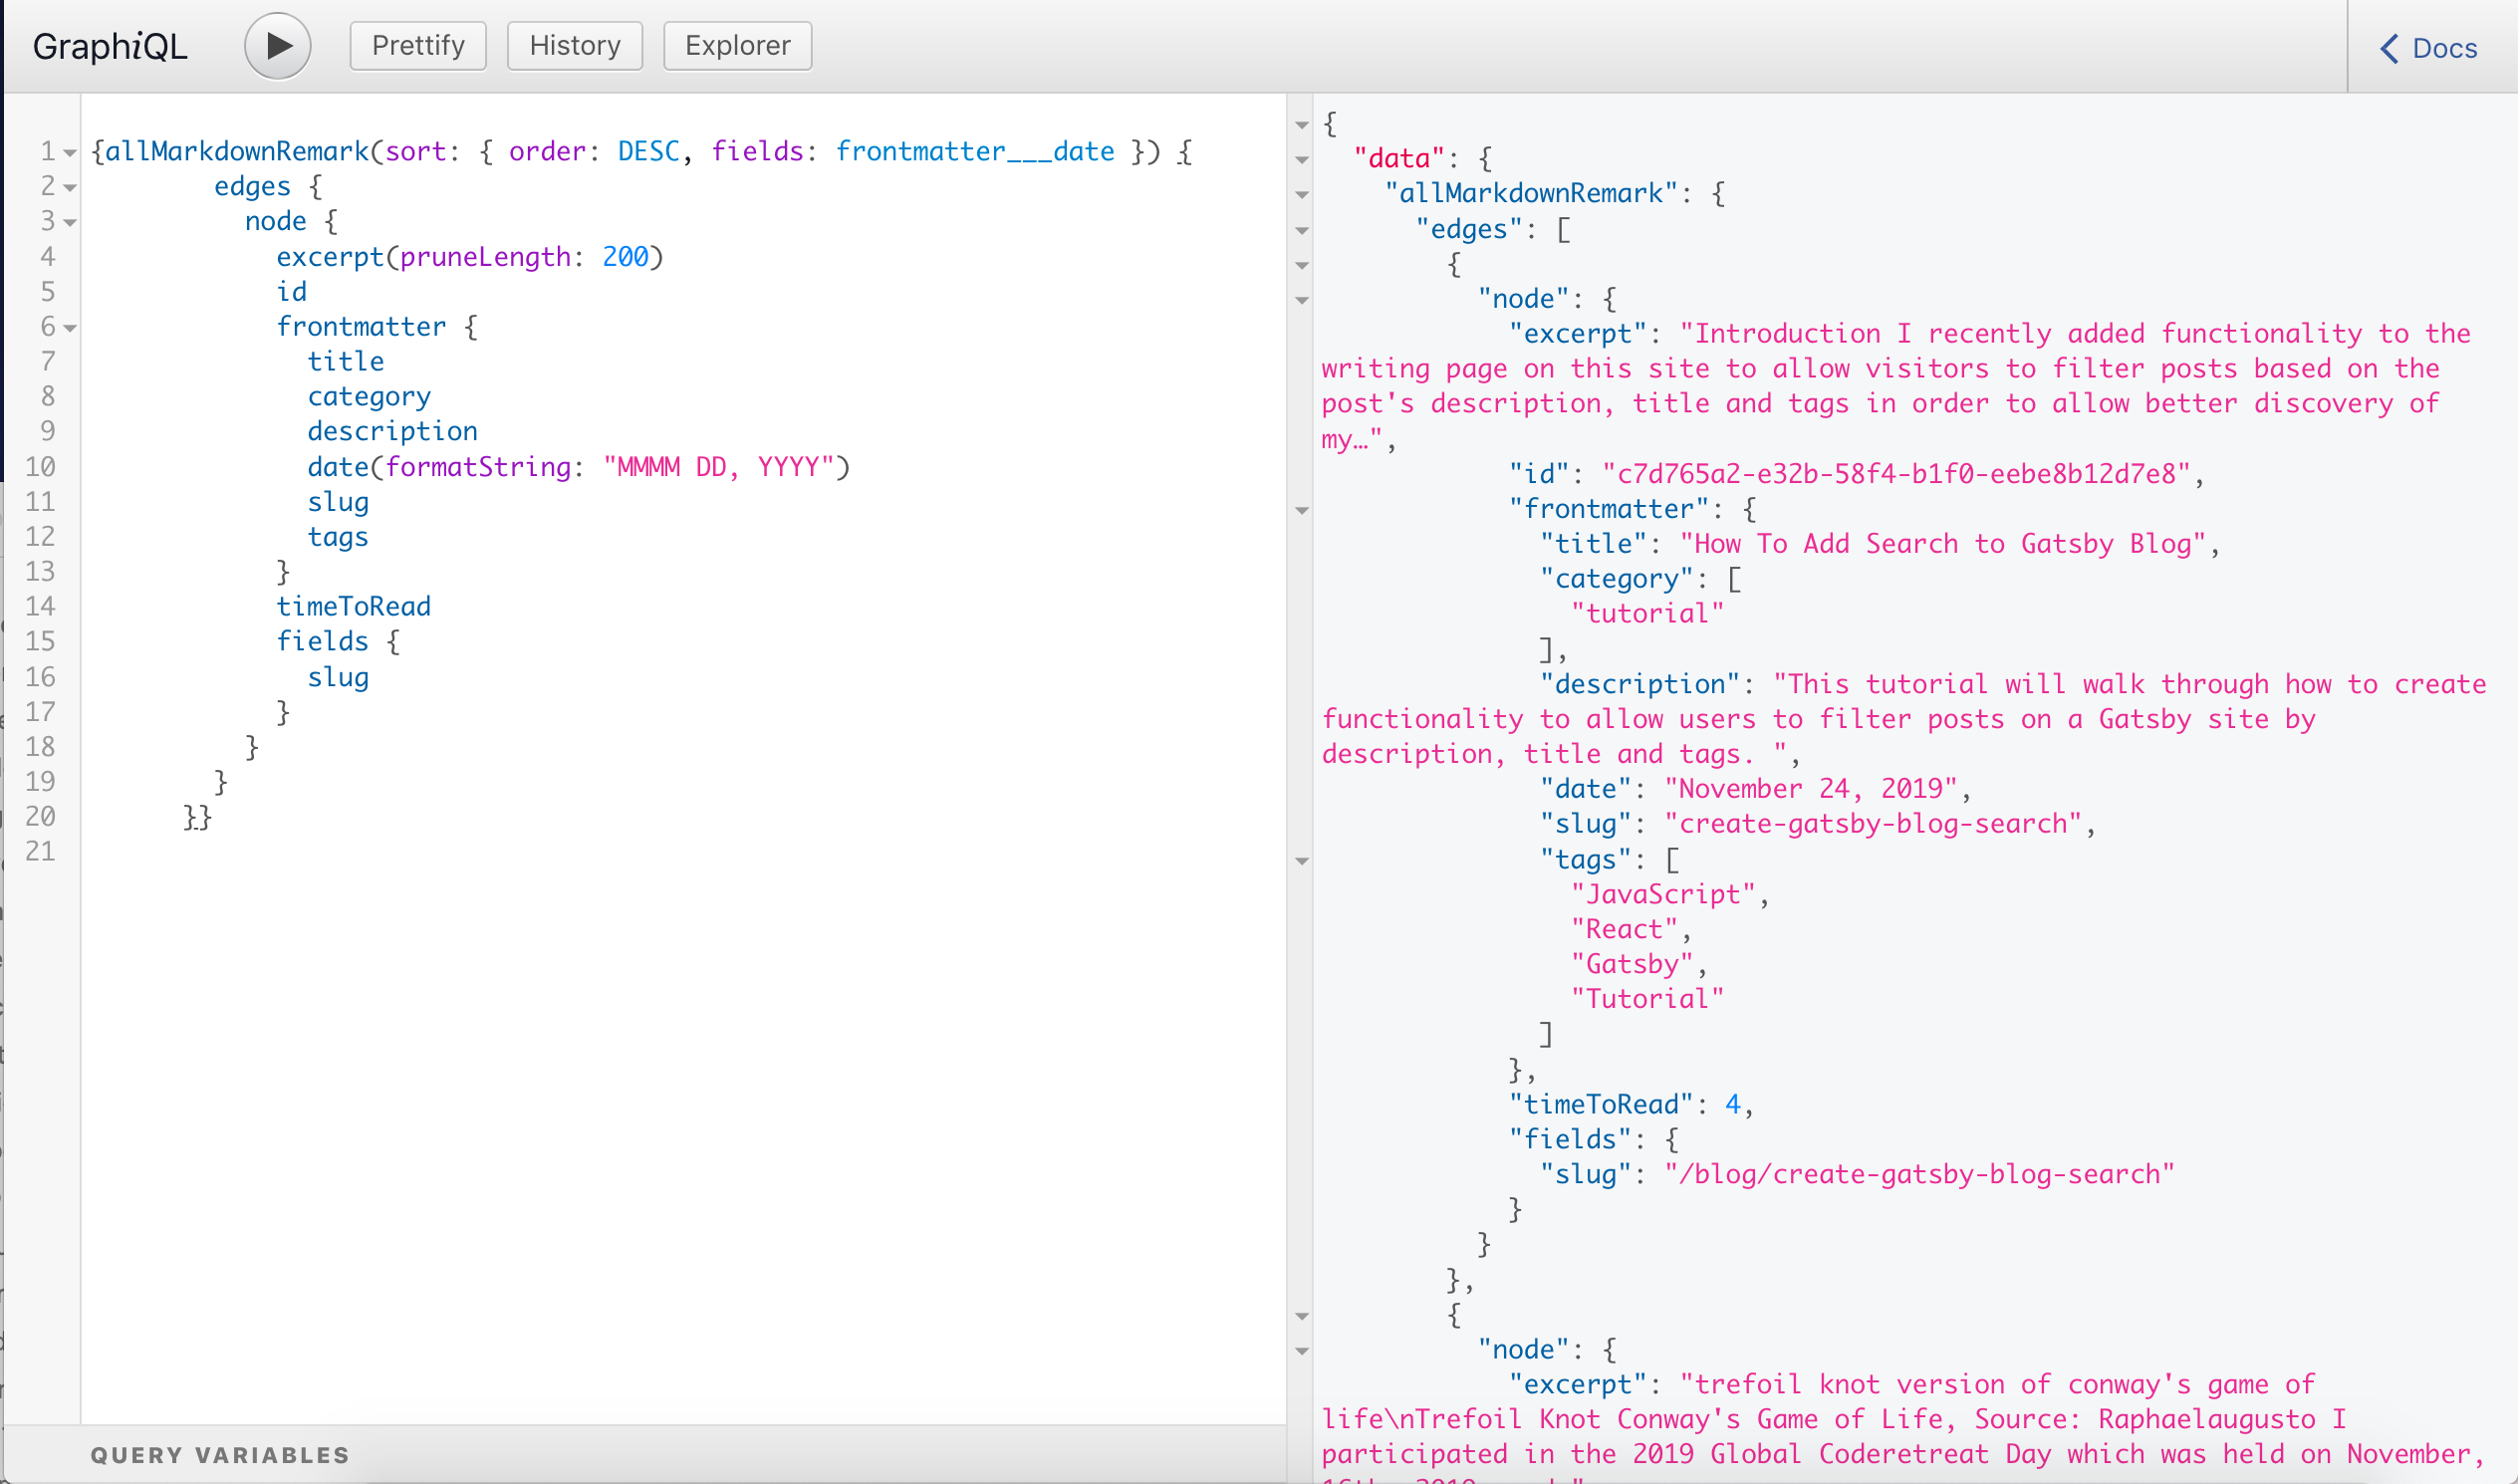
The boilerplate code above is a variation of the GraphQL query that my site uses to pull in each post along with its excerpt, id, frontmatter (title, category, description, date, slug, and tags). The blog posts are in the allMarkdownRemark as edges and can be accessed like const posts = data.allMarkdownRemark.edges.You can use the above-provided query to return metadata and slugs for all posts OR if you already have a query to return an index of all blog posts then feel free to use that.
Below is a photo that shows the data that the above GraphQL query returned for my site. You can view the data returned by that query for your particular site in an interactive format by running gatsby develop and navigating to http://localhost:8000/___graphql and pressing run. If you go to http://localhost:8000/___graphql and scroll down you should see that there is metadata being returned for every single post on your site which is exactly what we are trying to capture before we filter posts.
How to Filter Posts by User Input
Capture User Input with Input Event
Now that we have the boilerplate code setup let’s get back to the task at hand which is to filter the posts based on user input. How can we capture what query a user is searching for and update the DOM with the appropriate post(s) accordingly? Well, there are various types of browser events including, input, keypress, click, drag and drop. When these events occur JavaScript can be written to respond based on the type and value of the event.
Since we are having users type a search query into a <input> we can process their query as they type. We will be focusing on the inputevent which triggers whenever the value in an input field changes. The input event changes with each keystroke which is in contrast to the change event which is fired once for each submission (i.e., pressing enter) for <input>,<select> and <textarea> elements. You can read more about how React handles events in the React docs.
Create Input Element with onChange event handler
We already have the post data we need to filter available in the data prop so let’s create an element to allow users to type in their search query. <input/> will have an onChange property that calls a function handleInputChange whenever the <input/> changes and an Input event is fired. In other words, onChange calls another function which handles the Input event which fires every time someone types in our <Input/>. So if someone typed “React” into an <input/>. It will trigger 5 events with the following values (“R”, “Re”, “Rea”, “Reac”, “React”).
Note: The <input/> should go below the <h1> and outside of the posts.map.
<h1 style={{ textAlign: `center` }}>Writing</h1>
<input
type="text"
aria-label="Search"
placeholder="Type to filter posts..."
onChange={handleInputChange}
/>
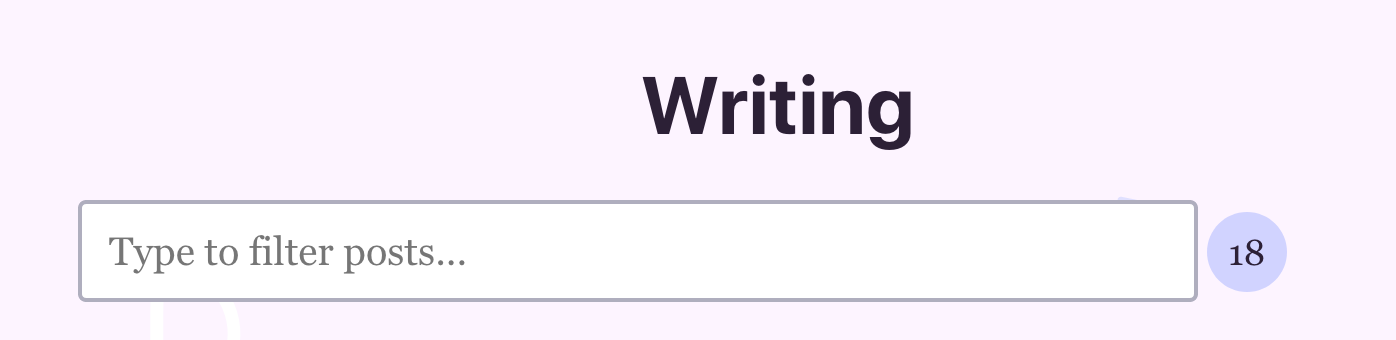
{posts.map(({ node }) => {The page should now visibly have an <input/> element. However, it will not yet be functional as handleInputChange has not been added yet.
useState() to Store Filtered Data and Query Information in State
Before implementing onChange let’s set the default state with useState() for our search input with the default query as an empty string and filteredData as an empty array. You can read more about the useState() hook in the React docs.
  const posts = data.allMarkdownRemark.edges
  const emptyQuery = ""
  const [state, setState] = useState({
    filteredData: [],
    query: emptyQuery,
  })
  return (
Implement onChange to Filter Posts by <input/> Event Value
This handleInputChange function takes the Input event in which the event.target.value is the query string that is being searched for. handleInputChange also has access to our props which contain all of the posts for the site. So we can filter all of the site’s posts based on the query and return filteredPosts.
In order to process the event (which fires on each keystroke) we need to implement handleInputChange. handleInputChange receives an Input event. The target.value from the event is the string that the user typed and we will store that in the query variable.
Inside of handleInputChange we have access to the posts and the query so let’s update the code to .filter() the posts based on the query. First, we should standardize the casing of the fields and the query with .toLowerCase() so that if someone types “JaVAsCriPt” it should return posts that match “JavaScript”. For our .filter() if any of the three conditions that check if the post contains the query evaluates to true then that post will be returned in the filteredData array.
After we filter the data in handleInputChange the state should be updated with the current query and the filteredData that resulted from that query.
  const [state, setState] = useState({
    filteredData: [],
    query: emptyQuery,
  })

const handleInputChange = event => {
  const query = event.target.value
  const { data } = props

  // this is how we get all of our posts
  const posts = data.allMarkdownRemark.edges || []


   // return all filtered posts
  const filteredData = posts.filter(post => {
    // destructure data from post frontmatter
    const { description, title, tags } = post.node.frontmatter
    return (
      // standardize data with .toLowerCase()
      // return true if the description, title or tags
      // contains the query string
      description.toLowerCase().includes(query.toLowerCase()) ||
      title.toLowerCase().includes(query.toLowerCase()) ||
      (tags && tags
        .join("") // convert tags from an array to string
        .toLowerCase()
        .includes(query.toLowerCase()))
    )
  })

  // update state according to the latest query and results
  setState({
    query, // with current query string from the `Input` event
    filteredData, // with filtered data from posts.filter(post => (//filteredData)) above
  })
}

return (
    <>
Now if you type in the <Input/> now it still won’t update the list of posts because we are always rendering the same posts regardless of if we have filteredData available in the state or not. But if you were to console.log(event.target.value) in handleInputChange we can confirm that handleInput is firing properly by typing “React”. Even though the page doesn’t visually change the console output should be something like:
r writing.js:1
re writing..js:1
rea writing..js:1
reac writing.js:1
react writing.js:1
Display Filtered Posts
We are already storing filteredData and query in state but let’s rename posts to allPosts so that we can make the value of posts conditional based on whether or not a user has typed a search query and should see their filtered search query results as posts or if they have yet to type a query then we should display all of the blog posts.
const BlogIndex = props => {
const { filteredData, query } = state
const { data } = props
 // let's rename posts to all posts
const allPosts = data.allMarkdownRemark.edgess
const emptyQuery = ""
For the posts we need to decide whether to return all of the posts or the filtered posts by checking state and conditionally rendering either all of the posts OR just the filtered posts based on whether or not we have filteredData and the query != emptyQuery.
The below code updates our render logic accordingly.
const { filteredData, query } = state;
// if we have a fileredData in state and a non-emptyQuery then
// searchQuery then `hasSearchResults` is true
const hasSearchResults = filteredData && query !== emptyQuery;

// if we have a search query then return filtered data instead of all posts; else return allPosts
const posts = hasSearchResults ? filteredData : allPosts;
Summary
You should now have a working post filter on your blog index page (if not check out the Final Code below). At a high-level the steps taken to implement filtering were:
- create a page query to implement a blog index page which lists all of the posts
- create an input field on the blog index page with an onChange event handler to process keystrokes in our input field
- filter all of the posts on the blog index page based on the current query (from input event) and use
useState()to update the state with the search query and filtered data - update rendering logic to either display all of the posts or the filtered posts on the blog index page based on whether or not there’s a query in state
Below is the final code as outlined in the tutorial. However, this is just the baseline for search and you may want to make the functionality more robust by adding additional features such as autocomplete suggestions, displaying the number of results (based on length of posts) and providing an empty state with messaging for when there are zero results (based on filteredData being an empty array).
Final Code
import React, { useReact } from "react";
import { Link, graphql } from "gatsby";

const BlogIndex = (props) => {
  const { data } = props;
  const allPosts = data.allMarkdownRemark.edges;

  const emptyQuery = "";

  const [state, setState] = useState({
    filteredData: [],
    query: emptyQuery,
  });

  const handleInputChange = (event) => {
    console.log(event.target.value);
    const query = event.target.value;
    const { data } = props;

    const posts = data.allMarkdownRemark.edges || [];

    const filteredData = posts.filter((post) => {
      const { description, title, tags } = post.node.frontmatter;
      return (
        description.toLowerCase().includes(query.toLowerCase()) ||
        title.toLowerCase().includes(query.toLowerCase()) ||
        (tags && tags.join("").toLowerCase().includes(query.toLowerCase()))
      );
    });

    setState({
      query,
      filteredData,
    });
  };

  const { filteredData, query } = state;
  const hasSearchResults = filteredData && query !== emptyQuery;
  const posts = hasSearchResults ? filteredData : allPosts;

  return (
    <>
      <h1 style={{ textAlign: `center` }}>Writing</h1>

      <div className="searchBox">
        <input
          className="searchInput"
          type="text"
          aria-label="Search"
          placeholder="Type to filter posts..."
          onChange={handleInputChange}
        />
      </div>

      {posts.map(({ node }) => {
        const { excerpt } = node;

        const { slug } = node.fields;
        const { tags, title, date, description } = node.frontmatter;
        return (
          <article key={slug}>
            <header>
              <h2>
                <Link to={slug}>{title}</Link>
              </h2>

              <p>{date}</p>
            </header>
            <section>
              <p
                dangerouslySetInnerHTML={{
                  __html: description || excerpt,
                }}
              />
            </section>
            <hr />
          </article>
        );
      })}
    </>
  );
};

export default BlogIndex;

export const pageQuery = graphql`
  query {
    allMarkdownRemark(sort: { order: DESC, fields: frontmatter___date }) {
      edges {
        node {
          excerpt(pruneLength: 200)
          id
          frontmatter {
            title
            description
            date(formatString: "MMMM DD, YYYY")

            tags
          }

          fields {
            slug
          }
        }
      }
    }
  }
`; Follow @monica.dev


Thanks @waterproofheart for this beautiful article on how to add a filter functionality to a @gatsbyjs website. https://www.aboutmonica.com/blog/create-gatsby-blog-search-tutorial
Huge thanks to @indigitalcolor for article about adding search to @gatsbyjs powered blog: aboutmonica.com/blog/create-ga… 👏🏻
Need to add basic filtering functionality in React? Check out my article on how I implemented search on my Gatsby site to filter articles based on keywords. aboutmonica.com/blog/create-ga…
Thanks i will take a look
Thanks for sharing ❤️. I am trying to create a blog ans was wondering how to implement the search. This will come handy 😊
This is a really great post for those interested in filtered search functionality on a Gatsby blog. Thanks for writing @waterproofheart aboutmonica.com/blog/create-ga…
I was just trying to get my head around adding search functionality to a site then remembered @jsjoeio sharing this! Thanks @waterproofheart ❤️ How to Add Search Functionality to a Gatsby Blog aboutmonica.com/blog/create-ga… #JavaScript #React #Gatsby #Tutorial
After reading this great article by @waterproofheart (aboutmonica.com/blog/create-ga…) I have added search functionality to justask.dev with some teaks. 😄 Also added some more content and a new @typescript section 🤗
I built a search input for a Gatsby blog using this super tutorial! aboutmonica.com/blog/create-ga… #JavaScript #React #Gatsby #Tutorial via @waterproofheart
I added search functionality to laurosilva.com ✨ @waterproofheart's tutorial was super helpful! Check it out: aboutmonica.com/blog/create-ga…
Merry Christmas in advance ☺️ + a search functionality I added to my gatsby site by following this article - aboutmonica.com/blog/create-ga… by @waterproofheart 🔥 #100DaysOfCode
If you're looking to add search functionality to your Gatsby (or non-Gatsby) site, check out this tutorial by @waterproofheart I used it for my site and it was super helpful 😄 aboutmonica.com/blog/create-ga…
Thanks @waterproofheart for this beautiful article on how to add a filter functionality to a @gatsbyjs website. aboutmonica.com/blog/create-ga…